Flashing the OpenGD77 Firmware onto a Baofeng DM-1701
By Stan Slachetka WA2JRZ
Note – some page references listed below have been changed by the OpenGC77 team and replacements are not available. The GitHub references appear to be correct. (12/26/25)
Note – this was originally an email sent to WB2MNF, who reorganized it for Crosstalk
I was able to flash the GD77 firmware onto the Baofeng DM-1701, with some exploring and adventures before it worked.
Much of it had to do with working in Windows 11 and also having to fill in a few of the “blanks” to identify all the software and files that I needed to download to make things work.
First, thanks to Chris for clueing me into the need to right click on the CPS installer file to be able to correctly open and run the file. Here is the error message I was getting:
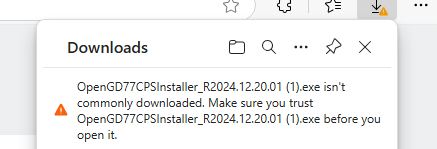
I needed to right click on the file and then click on “Always keep on this device” and then confirm that I wanted to trust the file before it loaded as an executable file. I assume someone running Windows 10 wouldn’t have this problem.
My first mistake was to use the following link:
[HOWTO] Flash the OpenGD77 firmware (new procedure) – OpenGD77
This one told me only part of the story that I needed to know. I should have used the following link provided in one of your emails:
TYT MD-UV380/390 / RT-3S / DM1701 Installation information – OpenGD77
Not only did I need to download the CPS installer, but I needed to download two additional files: the DM1701 and the MD9600 V5 “donor” firmware”
OpenGD77 installation (from the DM1701 installation information link above)
- Download and install the latest OpenGD77CPS from here downloads/PC_CPS/Latest/
- Download the latest firmware version from here downloads/MDUV380_DM1701/Firmware/Latest/
- Look for the following Zip folder: OpenDM1701.zip
- In the extracted folder, look for the following file: OpenDM1701.bin
- Download the official MD9600 V5 firmware , as the ‘donor’ from here https://www.passion-radio.com/index.php … chment=760.
- Look for the following Zip folder: 210525 MD-9600 V4 firmware for PLL2571
- In the extracted folder, look for the following file: MD9600-CSV(2571V5)-V26.45.bin
Both firmware files need to be available on your computer. (This is not obvious from some of the YouTube videos that are available online) The files need to be extracted from the Zip folders downloaded from the referenced links and copied onto your computer. I set up a DMR folder for all these files. Note that if you move the files you will need to find them again.
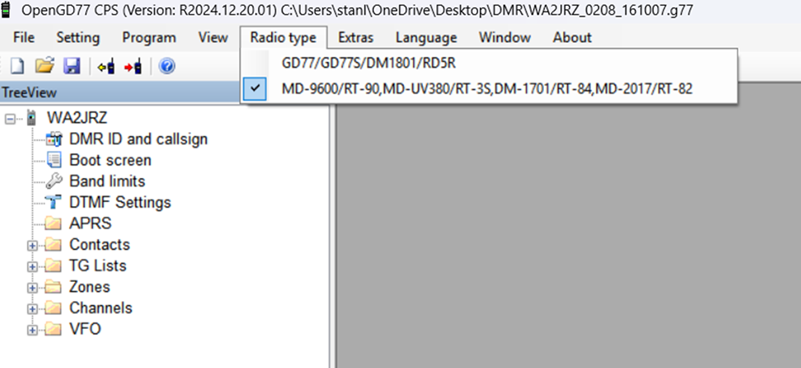
The firmware loader is accessed in the “Extras” drop down menu in the CPS program.
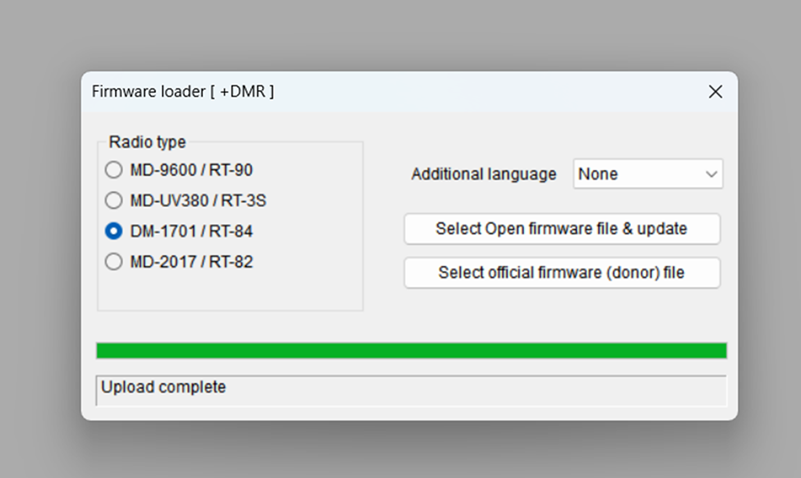
Hint: However, to be able to select the DM-1701 in “Firmware loader” in the “Extras” drop down menu you need to make sure you select the second drop down item in the Radio type drop down menu:
Once you open the firmware loader dialog box, you have to click on “Select official firmware (donor) file”. If you don’t have this file available on your computer, the Firmware Loader dialogue box will show only [ FM] and not [ +DMR].
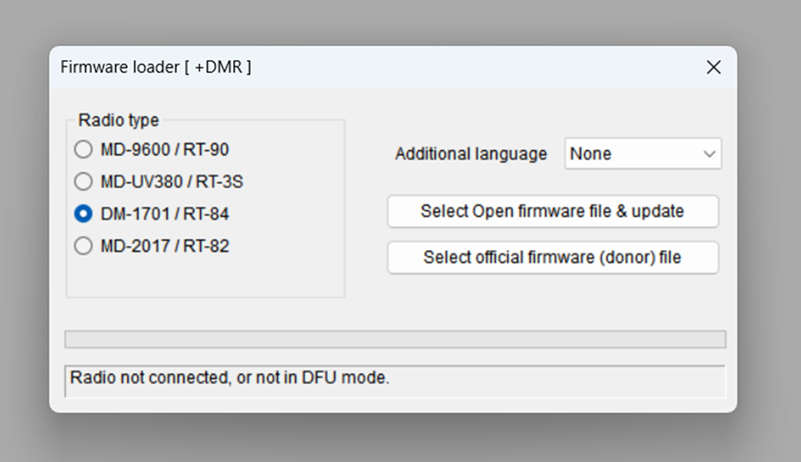
The “Select Open firmware file & update” button will be grey until you select the donor file. Assuming that you found and selected the donor file on your computer, you will get the following message:
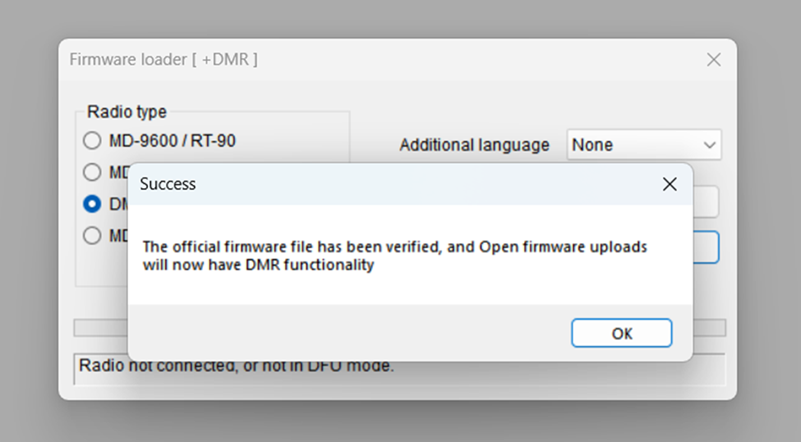
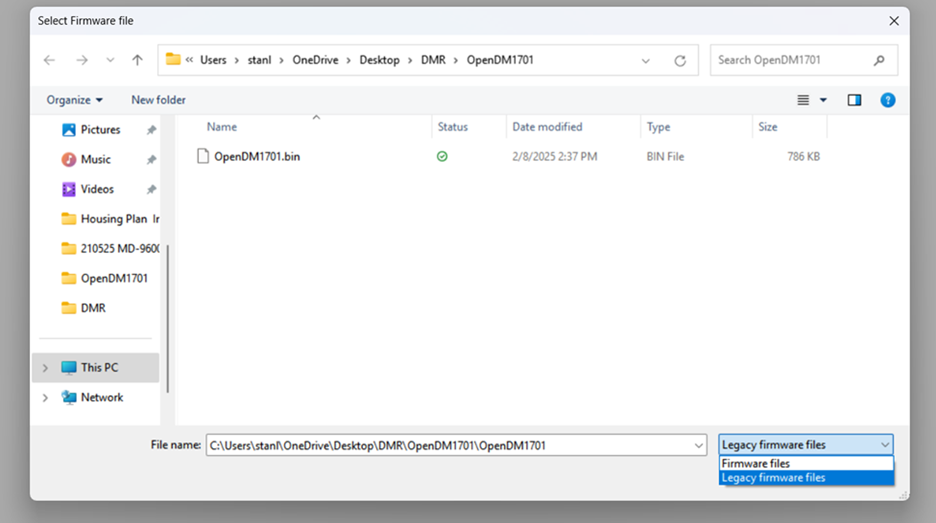
You can now click on the “Select open firmware file & update” button and find and select the DM1701 firmware you downloaded.
When searching for the OpenDM1701.bin file you need to make sure you select “Legacy firmware files” from the drop down menu in the lower right corner of the dialogue box, otherwise, you won’t see the file when you search in the OpenDM1701 folder. (No one mentions this in any of the instructions!)
Assuming that you have followed these steps and have the DM-1701 radio connected to the computer you should see the firmware update and then get the following:
Ah, yes…connecting the radio to the computer. I found some additional issues:
At first I was continuing to get the error message that the radio was not connected or in DFU mode even though I had it in DFU mode and it was connected to the laptop with the programming cable.
Checking around, I found out that I needed to install the correct driver for the radio. Without getting into too much detail about that search, I was able to find a Windows 10 version of the driver. I loaded the 64 bit version yet still could not find the radio in my Device Manager. I can get into more detail about that if someone needs assistance with the driver issue.
According to the available YouTube videos the radio was supposed to appear as STM Device in DFU Mode under Universal Serial Bus Controllers but no luck. Out of curiosity, I switched the programming cable from the USB port on the left side of the laptop to the one on the right side and eureka! it appeared not under Serial Bus Controllers, but as OpenGD77 in Com4 under Ports. Not sure why that worked as they are both USB 3.0, but I am glad that it did.

I was then able to flash the radio:

I’m not sure if I actually needed the driver, but it did work.